

Aren’t you tired of keeping all your necklaces in a box where they get all tangled up? It’s about time you did something about that. A necklace holder would surely help. There’s no need to go shopping for one. You can put together something yourself. We’re ready to show you 12 easy and inspiring projects, all representing DIY necklace holders. Each of them can be personalized and customized in various ways so don’t suppress your creativity.
For starters, consider repurposing a spice rack into a necklace holder. It would be an easy transformation. All you’d need to do is stain or paint the rack and then screw in some hooks. When you’re done, install it on the wall. IKEA Bekvam racks have this rod that can come in very handy when hanging necklaces or bracelets. Check out the full tutorial here.

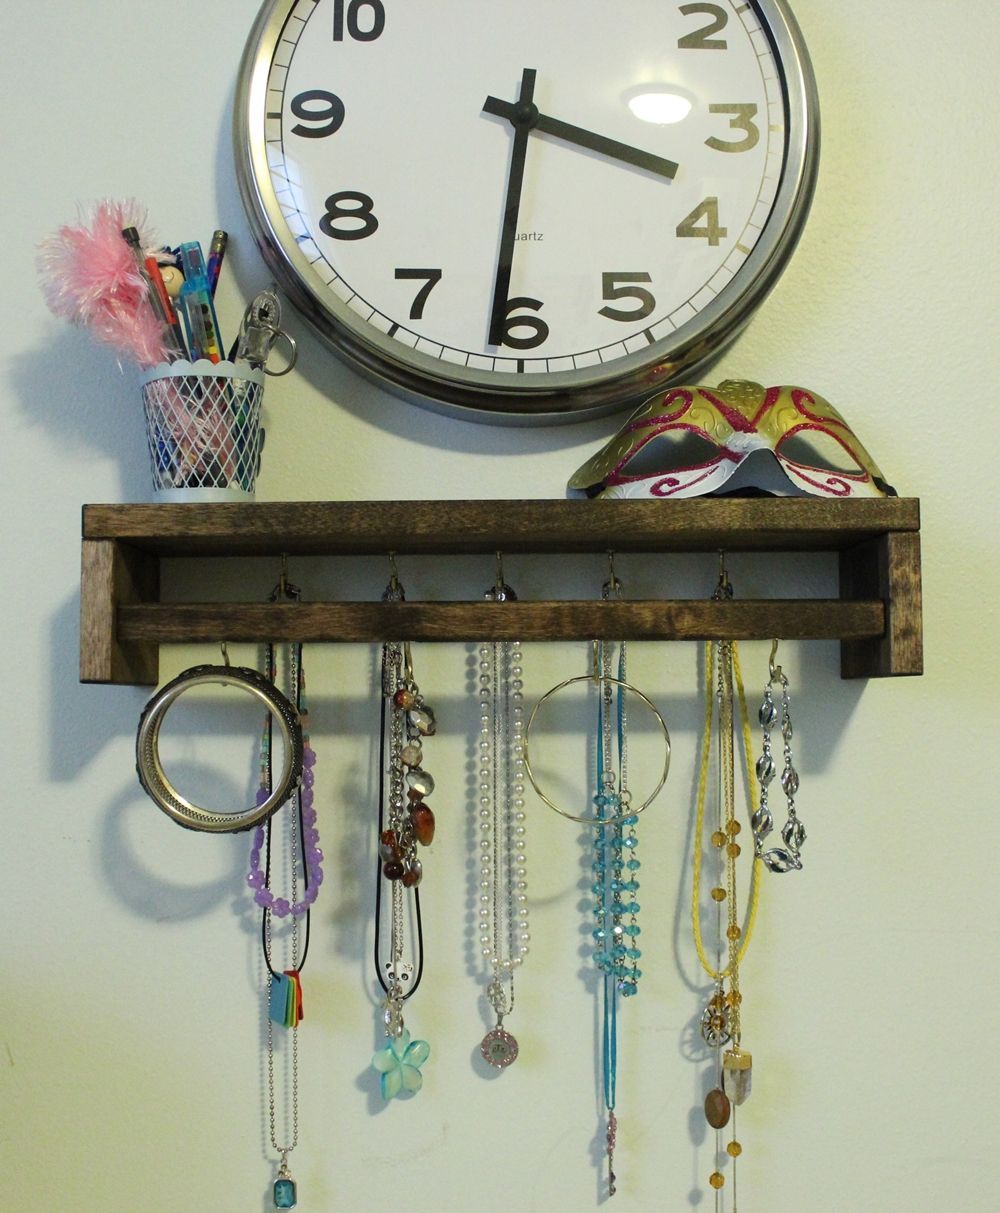
If you have necklaces that need to be organized, chances are you also ave other jewelry pieces in need of a similar treatment so perhaps you could build yourself an organizer. This wall jewelry holder is a pretty good option. it has those cute little knobs for necklaces and small trays in which to keep the earrings and rings.

How about a necklace holder that has industrial flair? You could easily make one out of some copper pipe pieces and some copper end caps and fitting adapters. You’ll also need a piece of wood to use as a support for the whole thing. You can mix and match the pipes and fittings however you want so be creative and give it an interesting, geometric structure. Check out ehow for more details.

A driftwood hanger is another lovely and very easy craft. The most important thing is finding a piece of driftwood or a fallen tree branch that has a shape and size that you find suitable for the project. Bring it home, clean it and decorate it with some tape and paint. Use some twine to hand it and add some screw-in hooks for the jewelry to hang from.
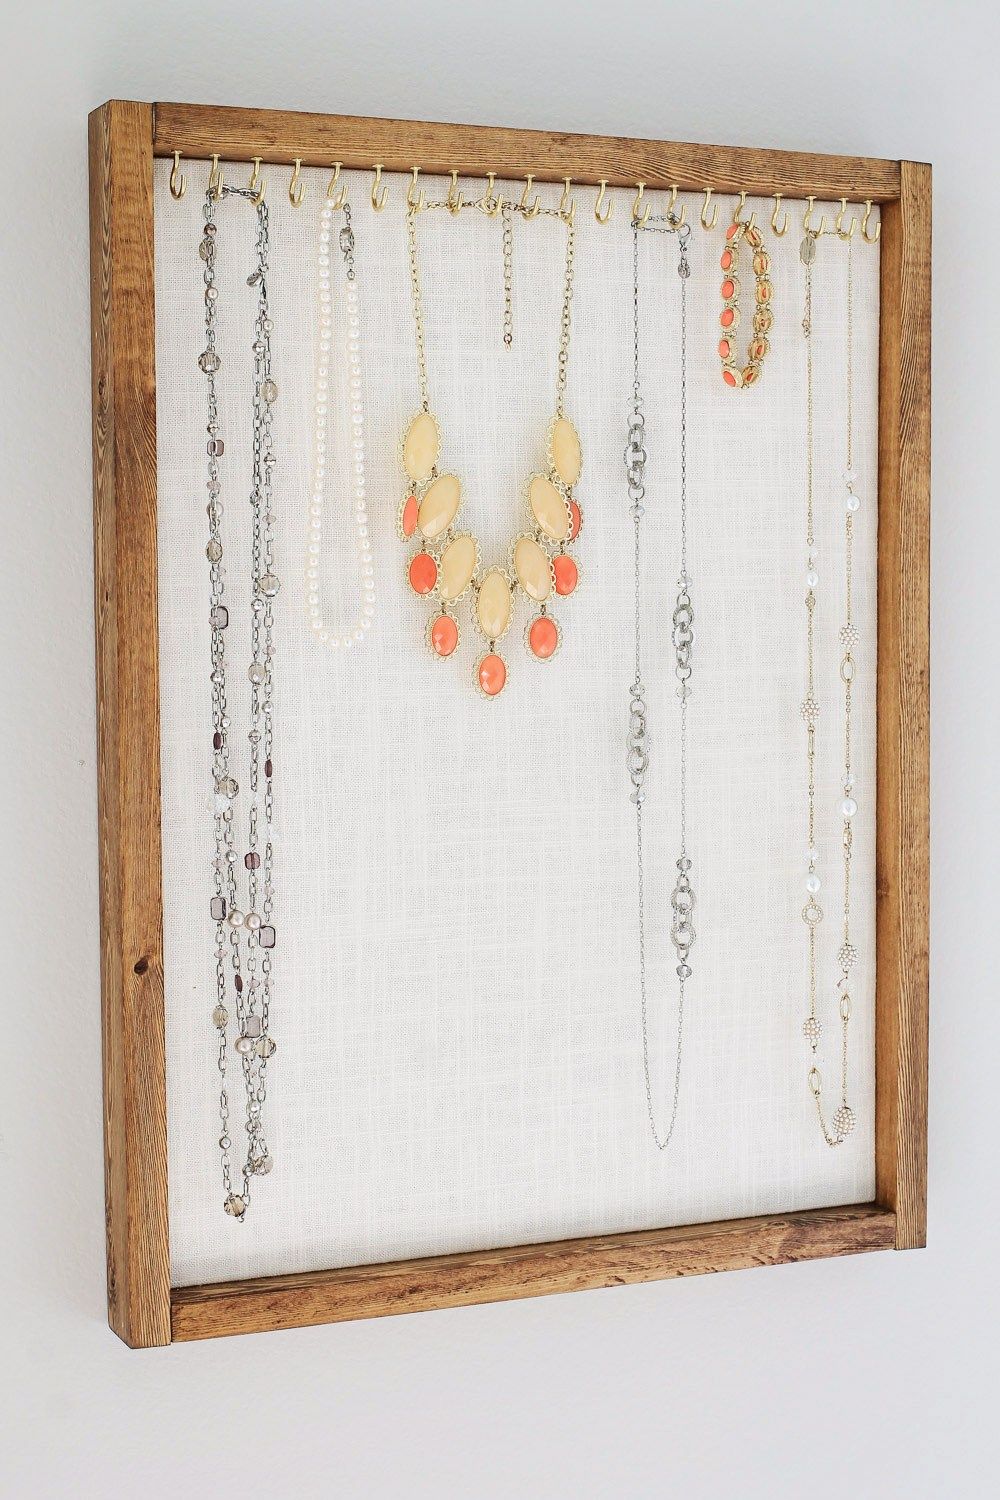
An old frame can be repurposed into a necklace holder and in case you can’t find a suitable frame you can always build one from scratch using a plywood panel and some scrap wood pieces. You’ll also need some fabric but you can also use paper if you want. In any case, you that to cover the plywood panel so you can have a clean backdrop for the necklaces to contrast with. The project is described in more detail on angelamariemade.

A necklace holder can double as a wall decoration and that’s actually great if your walls lack color and ornaments. Don’t go overboard with the design. Keep it simple and it will look clean, chic and stylish. You can look for inspiration on melissating. This necklace holder seems like a very easy craft with very few supplies needed.
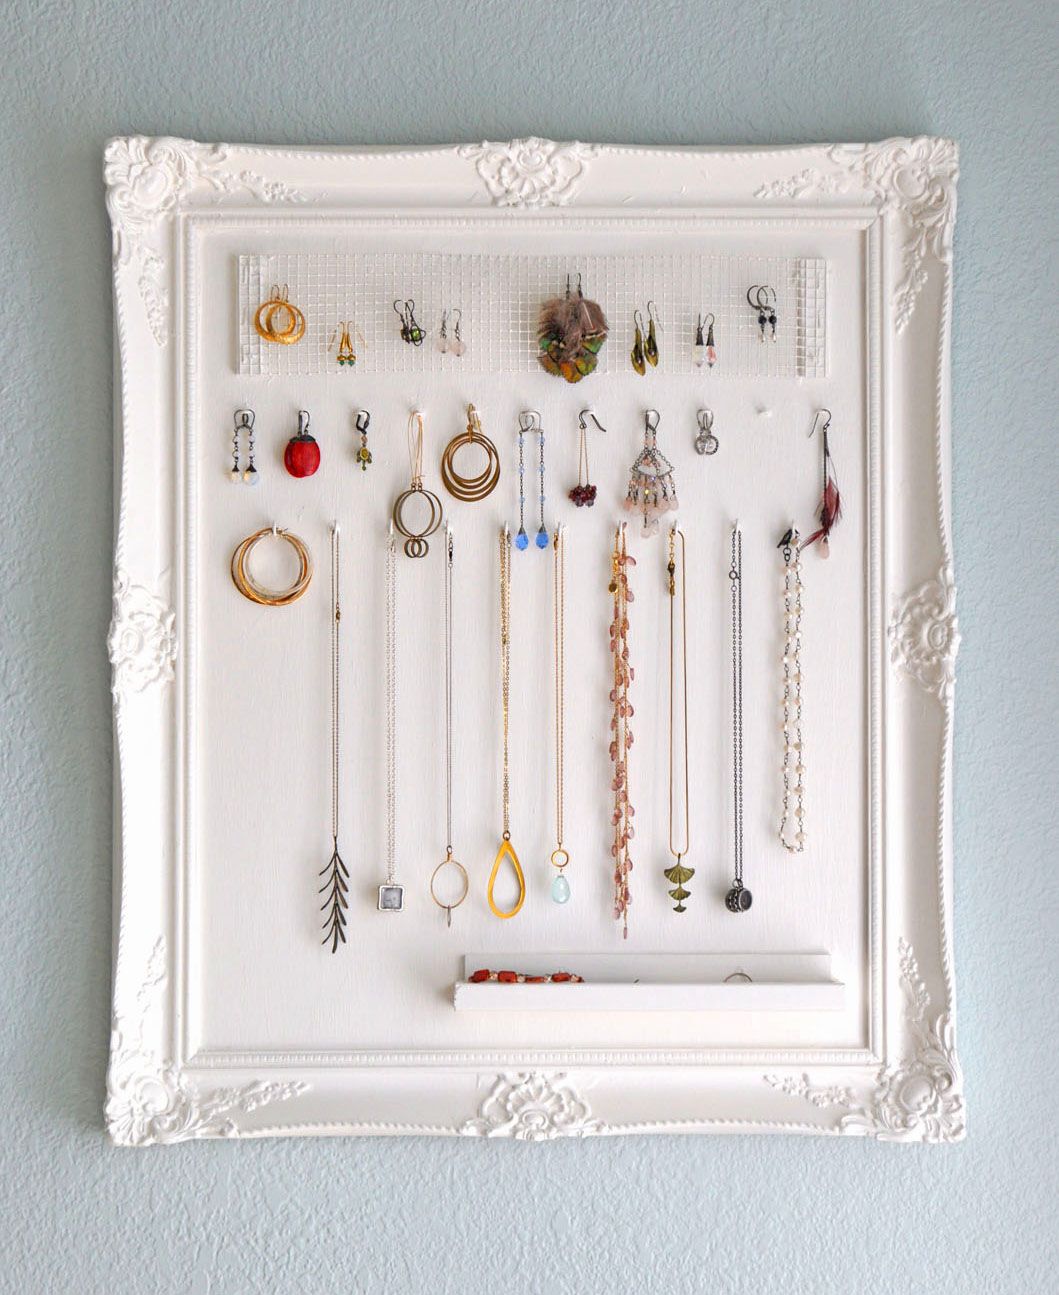
The framed jewelry organized featured on monaluna is both elegant and practical. Notice that it has a thin storage tray at the bottom. It’s useful for storing pendants, rings and other small jewelry pieces and accessories. We also like the fact that the frame and the back panel were painted all white. If you want, you can use some sandpaper to create a distressed, vintage look.

A necklace holder can be as simple as a wooden board with some knobs on it. Actually that’s a pretty good description of the project showcased on asmithofalltrades. As you can probably anticipate, you don’t need many things if you want to make something similar. So go find yourself a board, stain it or paint it, drill two holes in two of its corners so you can hang it and screw in a few knobs. You can mix and match them however you want.

Perhaps you’d like to try a design that’s a bit more abstract and doesn’t necessarily look like your average DIY necklace holder. It could be a stylish jewelry stand like the one on diys. This is what you’ll need: two 90 degree elbow copper pipes, two copper pipes, two wooden dowels of different sizes, a wood base, some glue, a hammer and nails.

These jewelry display canvases also look a bit abstract and very stylish, serving both as organizers and as decorations for the wall. They were made using white canvases, wooden beads and wall hanging hooks. They look very clean and beautiful and they really put an emphasis on the jewelry that they hold. {found on diys}.

The last two projects were covered in detail in previous tutorials. One is a copper pipe stand that sits on a wooden base. The arms are perfect for holding necklaces and bracelets and the fun thing about this project is that you can shape the stand however you want and make it as big as you need to, depending on how large your collection is.

This branch jewelry holder is meant to have a sculptural and artistic look. It’s probably the easiest project in our list. All you need to do is find a tree branch that you like and screw it onto the wall. Obviously, you can spray paint it if you want or you can wrap it in yarn, even decorate with washi tape.

A simple but at the same time stylish dish would be all you need to store your everyday jewelry and give it a designated spot so you can easily and quickly find it when you need it. You can make the dish yourself and you can use concrete mix to make it extra special. Give it a cool shape and have fun creating the mold for it. If you like this idea, check out the details on diys.

You’ve seen this style of necklace holder before so it’s not a surprise that tree branches are very useful for such projects. To obtain this particular design you need a few simple things which you shouldn’t have trouble getting: a dead tree branch, a concrete plant pot saucer, a rubber chair leg tip, extra strong glue, sandpaper and either timber wax or oil to give the branch a shiny finish. All of these things combined will give a unique jewelry tree display.

Here’s another really cool jewelry wall display idea, one which makes use of drawer knobs. If you want to make something similar then your design would have to differ a bit and will be unique. This is a very simple project and all you need for it is a piece of wood(reclaimed boards are best if you’re going for a rustic look), drawer knob and a drill.

Another option is to have a different tab for each piece of jewelry which makes this whole design modular and more versatile. You can attach these leather tabs to a board or directly to a wall. You can also install them on the inside of a cabinet door if you’d rather not have them in plain sight. Either way, this leather tab jewelry holder is going to be exquisite.

Here’s another knob-based jewelry holder, this time with more cute and colorful knobs than the one mentioned earlier. They’re arranged in a zig-zag pattern on a piece of wood and the result is a colorful and very charming organizer which you can use for jewelry but also for various other small items. The complete tutorial for this project can be found on squirrelsofafeather.

If you don’t want to have all your jewelry on display, perhaps you’d prefer to have everything stored inside a drawer. Of course, things would get messy really fast if you simply throw all your jewelry in the drawer so consider using the idea presented on thesummeryumbrella which makes use of bowls to organize everything and keep the mess at bay.

This particular design is great if you have lots of bracelets or watches that need to be stored and organized in a neat and stylish way. The project is not difficult at all and it’s also very cheap to make. The actual rod which holds all the bracelets is a paper towel roll wrapped in fabric. This is attached to a wooden base using a dowel. You can find out all the details and instructions on iheartorganizing if you’re interested.

As we mentioned already, drawer knobs are very useful when you’re building a custom jewelry organizer and they’re not actually not your only option. You can also incorporate drawer pulls and handles into your design and you can have a lot of fun combining different styles and shapes. All it takes is a trip to the hardware store. Check out thehappyhousie.porch for more details about this cool project.

This is a jewelry organizer that uses tree branches but not in the way that you might expect it. This time, the branches are attached horizontally to a wooden board and they act as pins or hooks that you can hang necklaces and bracelets on. You can have the branches painted or you can decorate them with washi tape to make them look extra lovely. This design idea comes from rebeccasdiy.

In case you want your jewelry organizer to look super simple but at the same time to be chic and stylish, we suggest checking out a project featured on stylebyemilyhenderson. It explains how you can make these exquisite jewelry blocks using 2×2 blocks of wood, sawtooth hangers and glue. It’s one of the simplest projects on this list and one of the most stylish ones as well.

If you’re interested in making a tabletop jewelry holder, there are plenty of designs to choose from, some of which have already been presented to you. Another one comes from anikasdiylife. It’s a simple project for which you need a few pieces of wood, a round dowel, some floral wire, cup hooks, doll pin stands, a staple gun and some glue. Optionally you can add some color to your design if you want to.

Although you can simplify this project by using a single wooden boards instead of all the different wood floor samples, we think this idea is quite clever and gives this organizer lots of character. That being said, you also need a drill, screws, wood glue and velcro hanging strips if you want to make something similar. All the details of this project can be found on creatingreallyawesomefunthings in case you need additional info.
The post 24 DIY Necklace Holder Ideas To Spark Your Imagination appeared first on Home Decorating Trends - Homedit.